Monday, April 30, 2012

Garlic Parmesan Croutons

If I'm going to eat an entree salad for dinner, it must include something pretty indulgent to balance out the extreme healthiness of all the raw vegetables.  Today's indulgence is the butteriest, cheesiest, garlickiest, most delicious homemade croutons I've ever tasted.  They are incredible and I could eat them ALONE as an entree and be perfectly satisfied.


I often can't finish a whole loaf of really good bakery bread before it gets stale.  Well, actually, that's a bald-faced lie.  I can much too easily polish off a loaf of bread in a couple of days, but I try not to!  So when the butt-end of a great loaf of bread (Rustica's multigrain, for example) starts to get a little old and difficult to cut, I dice it into cubes or pulse it in a food processor and store in the freezer.  It's a great way to always have high quality breadcrumbs on hand.


Tonight I took some frozen bread cubes, tossed them with melted butter and olive oil, pasted garlic, parmesan cheese, and chives.  After a brief stint in the oven, they came out golden and crisp on the outside, soft and chewy on the inside, and completely exploding with a toasted garlic and parmesan flavor.


I served these rich croutons on a bed of romaine with chopped cucumber, carrot, radish, cherry tomato, and hard boiled egg.  The dressing was another indulgence:  homemade buttermilk, herb, and blue cheese.  But without a doubt, the best part of this salad was the magical little baby cheesy toasts.  They're so good, I'm bringing them to lunch tomorrow with another big green salad and I don't even care if I get garlic breath.


Garlic Parmesan Croutons
Serves 4

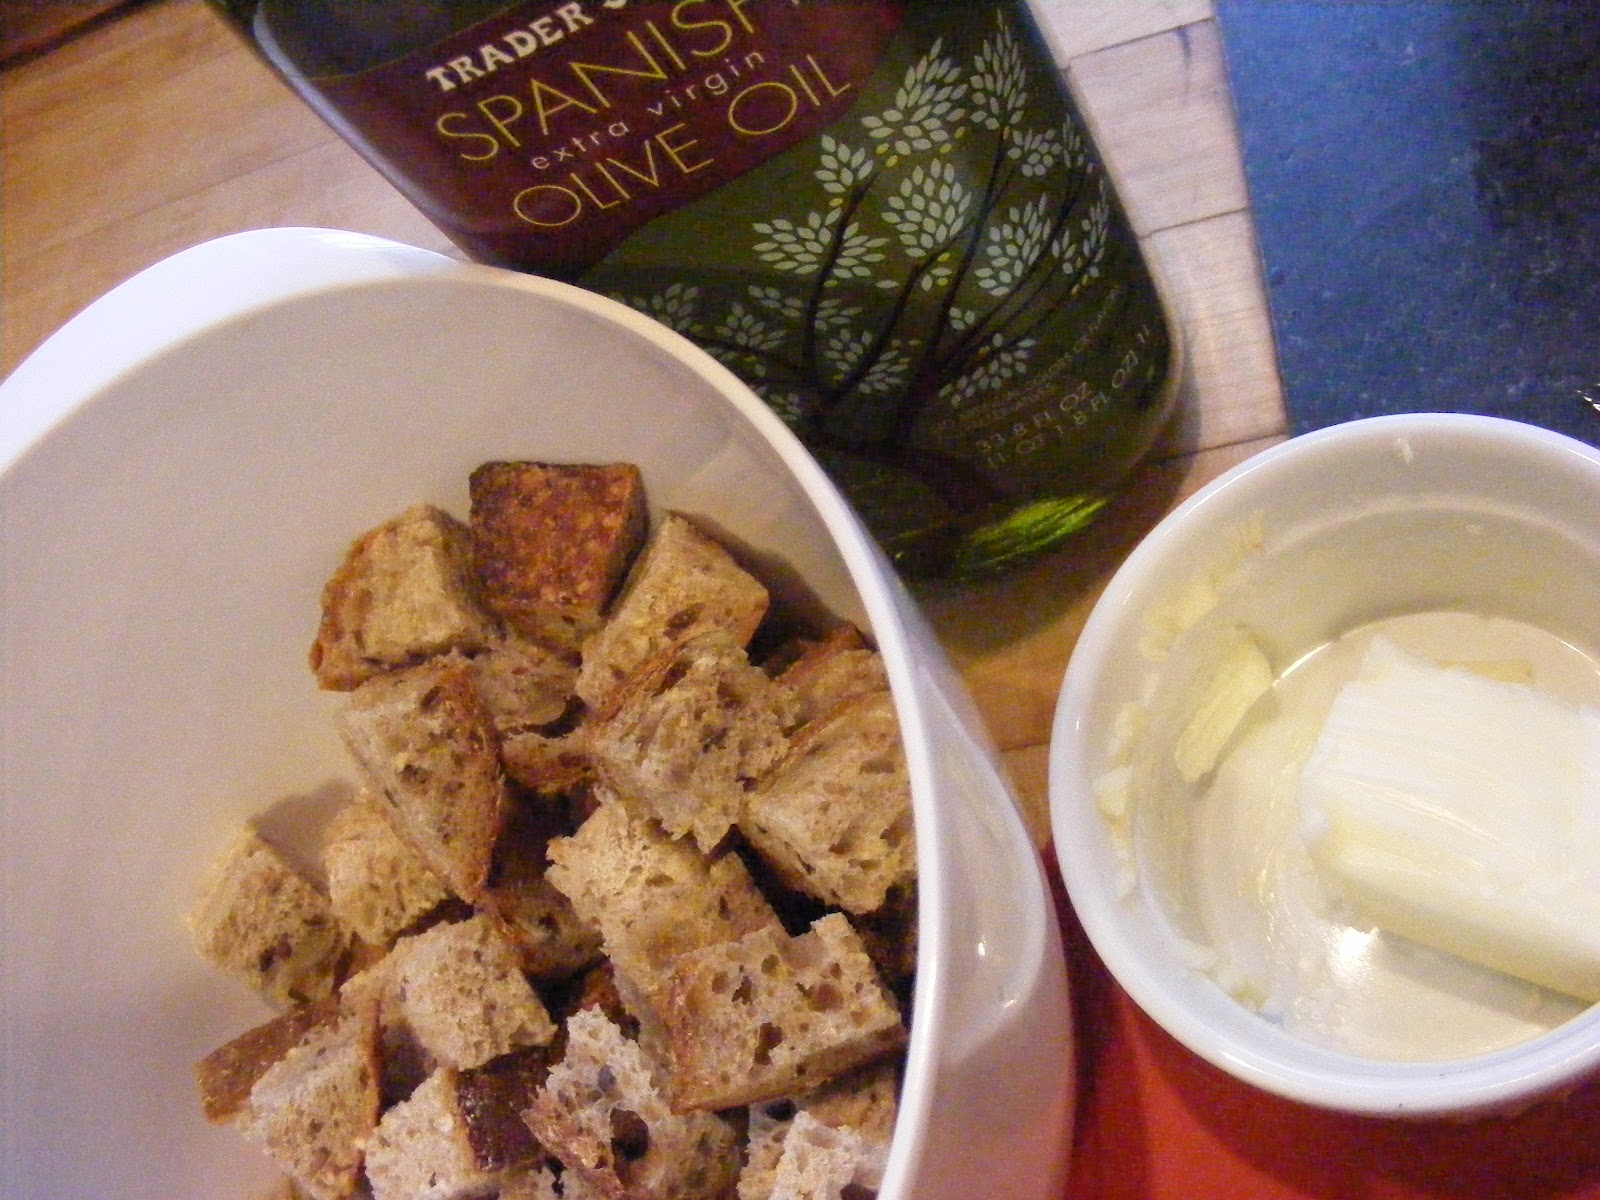
3 cups bread cubes (it helps to use best quality you can find)
2 Tbsp melted butter
2 Tbsp olive oil
1 garlic clove, pasted * (see note)
1/4 cup finely grated parmesan cheese (again, quality counts)
1 heaping Tbsp chopped chives or other herbs, optional

*Note:  Pasting garlic is one of my favorite kitchen techniques.  To paste garlic, chop a clove with a big pinch of kosher salt, then smoosh on your cutting board with the wide side of your knife.  Alternate chopping and smooshing until it forms a paste.  This will ensure you don't get a big bite of garlic, just lovely flavor permeating all your croutons.


Preheat oven to 350 degrees.

Place your bread cubes in a large bowl.  Melt your butter and add oil and pasted garlic.  Pour over bread crumbs and mix thoroughly to coat all the bread with the oil/butter.  Toss in cheese and herbs and stir again.

Spread bread on a baking sheet in single layer.  Cheese might not stick to bread, that's OK, it will still taste great on your salad!  Bake until cubes are golden brown and slightly crispy.  It took my oven 12 minutes.  They get crispier as they cool.  Serve with soup or salad.

ONE YEAR AGO:  Peanut Maple Salad Dressing, aka "Ben's Sauce"
TWO YEARS AGO:  Chipotle Salad Dressing
THREE YEARS AGO:  Breakfast Strata

Tuesday, April 24, 2012

Grilled Vegetables with Balsamic Reduction

Last summer my friend Ann brought a plate of grilled vegetables to a potluck party, along with a squeeze bottle of balsamic reduction sauce.  It was brilliant and heavenly, but she said she has to buy the sauce online, and I think it was pretty expensive.


Balsamic reduction sauce is simply balsamic vinegar boiled down until it's thick and syrupy.  Really, it's a snap to make at home as long as you have a pot and a stovetop.


A few important things of note in making a balsamic reduction sauce.  First, this is not the time to use your fancy aged vinegar, it would be a waste.  It's OK and encouraged to use your cheap stuff (I think my large jug from Trader Joe's was about $4), because in reducing you get all the sugars to concentrate and make a great sauce.


And second, make sure you open your doors and windows while boiling the vinegar and DO NOT breathe in the fumes.  I busied myself with the grill outside while my vinegar was boiling because every time I stepped in the house, my eyes began to water.  After an hour of open windows, though, the house was aired out and habitable again.


It's worth the temporary inconvenience, because you can keep the sauce for last minute drizzling on salads, vegetables, meat/beans, eggs, or with bread.  It provides a great depth of flavor and sweetness to whatever you are cooking.


Grilled Vegetables with Balsamic Reduction
Serves 4

2 cups cheap balsamic vinegar
1 Tbsp sugar (optional - I didn't use)
Your favorite variety of cleaned, cut vegetables and/or meat.  I used bell pepper, red onion, mushrooms, zucchini, and extra firm tofu.
Brown rice or quinoa, cooked in vegetable stock

In a medium saucepan, bring vinegar (and sugar, if using) to a boil.  Reduce heat slightly (do not cover, you want the water to cook off and evaporate) and continue to boil gently for 30-45 minutes or until the vinegar coats the back of a spoon.  I ended up with about 3/4 cup reduced vinegar.

Cook your rice or quinoa in vegetable stock and keep warm until ready to eat.

Heat your grill or oven.  Coat veggies and meat/tofu with oil, salt, and pepper.  Grill or roast until slightly charred.

Serve quinoa/rice, topped with grilled/roasted veggies, then drizzled with balsamic reduction.

ONE YEAR AGO:  Ten Minute Tuna Noodle Casserole
TWO YEARS AGO:  Steamed Artichoke with Balsamic Aioli
THREE YEARS AGO:  Fish Tacos

Sunday, April 22, 2012

Miso Butter Green Beans

I've lived in my house for over 7 years and ever since I moved in, my refrigerator has been a noisy companion. It's small (has to be, to fit into my tiny house!), only 14.8 cubic foot capacity, but it suited my needs and kept things cold (or occasionally/randomly, frozen - I lost a lot of greens this way).  Sometimes, loud banging sounds would come from inside and I told people it was the little refrigerator man trying to get out.  I said I'd keep it until it died.


Well, it didn't die, but it was on its deathbed this week and started making a very frightening buzzing noise.  It was so loud, my brother Zack thought it was my clothes dryer buzzing.  So, I mercifully euthanized my refrigerator and now have a brand spanking new model that's quiet and efficient and clean and wonderful.


During the transfer of all my condiments (I have many), I found my tub of miso that I haven't used in a long time.  Then I thought of the delicious baked sweet potatoes with miso butter I had on my yoga vacation.  I don't have any sweet potatoes in the house, but I did have green beans (and a yellow bell pepper and carrots) that need to be used up so...presto!  Miso butter green beans were born.


Miso is a fermented soy product that's incredibly good for digestion because it contains micro-organisms, similar to yogurt.  It's got a great savory salty taste.  And vegetables like green beans, carrots, and bell pepper....c'mon, you know they're good for you, too!  A little butter just blends it all together in a delicious rich way.  And, since pretty much everything on the planet tastes better when topped with a poached egg, I went ahead and did just that.  It was awesome.


Miso Butter Green Beans
Serves 4

1 lb green beans, stems removed and washed
other veggies, optional (I used carrot and bell pepper, sliced to same size as beans)
1 Tbsp butter
1 Tbsp white miso paste

Heat a half cup of water to a boil in a large pot.  Add green beans and a pinch of salt.  Cook for only 2-3 minutes, or until green beans are crisp-tender.

Drain out any water and return hot beans to pot and immediately add butter and miso and toss to melt it all together.  Serve with a poached egg and red chili flakes.

ONE YEAR AGO:  Saag Paneer
TWO YEARS AGO:  Seafood Lasagna
THREE YEARS AGO:  Spring Rolls and Lychee Martinis

Tuesday, April 17, 2012

Leek Toasts with Blue Cheese

Last week I was going to write a post about quitting this blog for good, but I just knew that as soon as I did that, I'd have a great idea for something to cook that I would want on the blog about.  So, I just waited.  Thanks for waiting with me.


Today I was going to make a repeater recipe (creamed leeks) but at the last minute, changed it up slightly to make it new.  I'm not sure this recipe is so exciting that it's worth reading about, but I thought it was absolutely freaking delicious so I wanted to post it.


It's simply butter-and-oil sauteed leeks (which are basically the sweetest mildly oniony things you've ever tasted) on toast with blue cheese.  I consider this the spring version of my favorite summer sandwich.  I think leeks are the best early spring vegetable!


This is a top notch entree with a big green salad, or I would not be embarrassed to serve this as a beautiful appetizer at a spring dinner party.  The flavors together are incredible - sweet, salty, creamy, crunchy, and savory.  Like with all recipes that only have a few ingredients, it's worth your time to search out the highest quality you possibly can.


Leek Toasts with Blue Cheese, adapted from Smitten Kitchen
Makes 4 toasts (2 per serving)

2 leeks, white and light green parts - cut and soaked to clean
1 Tbsp olive oil
1 Tbsp butter
Few drops lemon juice
4 slices bread (I used multigrain from Rustica)
Cheese crumbles (I used Carr Valley Billy Blue, a mixture of chevre and blue cheese - you can use blue, gorgonzola, feta, or chevre)

Preheat your broiler.

Heat your oil and butter in a medium skillet over medium heat.  Add sliced cleaned leeks, and season with salt and pepper.  Cook and saute over medium heat for 8-10 minutes until leeks are soft and all liquid has cooked out.  Turn off heat and add a small squeeze of fresh lemon juice.

Slice your bread and brush with olive oil on both sides.  Broil until toasted on first side, then flip.  Add a large spoonful of sauteed leeks to each slice and top with cheese crumbles.

Broil 2-5 minutes until cheese is browned.  Serve hot or at room temperature.

ONE YEAR AGO:  Leek and Asparagus Bread Pudding
TWO YEARS AGO:  Fattoush Salad
THREE YEARS AGO:  Honey Mustard Chicken Salad

Sunday, April 1, 2012

Morning Glory Muffins

I seem to be accumulating quite the collection of healthy breakfast muffin recipes.  I've got banana date bran muffins, zucchini oat bran muffins, chunky apple muffins, and the amazing (but poorly titled) breakfast muffin.


They're all nutritious AND delicious, which is a good thing.  But for some reason instead of making one of them this morning, I went and tried a new recipe.  To be perfectly honest, this has many of the same ingredients as all the above recipes and doesn't taste a whole lot different (which is to say, they taste very very good).


In my opinion, a good breakfast muffin contains a little bit of sweetener (so as to not be overly sweet like cake, this is breakfast after all!), a bunch of whole grains if possible (bran, flax, whole wheat flour, etc), and as many other nutrition-packed add-ins you can find (like fruits, vegetables, and nuts).


In the right combination, those components will result in a muffin that gives you energy, makes you say "yummmmm," and pairs perfectly with hot coffee or tea.  This is one of those recipes.  Go wild substituting as many other healthy things as you can (I certainly did!).


Whole Wheat Morning Glory Muffins, adapted from Whole Foods Market
makes 18 muffins

1 1/4 cups whole wheat pastry flour
2 Tbsp ground flaxseed
1/4 cup white sugar
1/4 cup brown sugar
1/4 cup maple syrup
1 1/2 tsp baking soda
1 tsp ground cinnamon
1/4 tsp ground nutmeg
1/4 tsp salt
2 eggs
1/3 cup coconut oil (or olive oil)
1/3 cup applesauce
1 tsp vanilla
1 apple, cored and diced finely (or substitute crushed or diced pineapple)
2 medium carrots, shredded finely
1/2 cup dried cranberries or other dried fruit
1/2 cup nuts (I used pistachios)
1/4 cup unsweetened flaked coconut

Mix all ingredients together (first dry ingredients, then add wet, then fold in fruit/veg/nuts).  Spoon into lightly greased muffin tins, sprinkle with more coconut.  Bake at 350 degrees for 17 minutes, or until a toothpick comes out clean after being inserted in center.  My oven runs hot so you may need to bake a bit longer.

ONE YEAR AGO:  Chicken Parmesan with Zucchini Noodles
TWO YEARS AGO:  Baked Egg Rolls and Potsticker Salad
THREE YEARS AGO:  Cold Press Coffee