What a year. By all accounts, it was a tough one for the world in general. Natural disasters, political upheaval, economic meltdowns, poverty, war, and general pessimism have impacted millions.
Conversely, it was a very good year for me personally. I'm feeling so strong and healthy thanks to a very amazing and supportive group of family and friends, yoga, and this blog. Even though I'm creepin' up on [gulp] my mid-30's, I feel better than I ever have in my life. It's still mind-blowing to me how much your life can change when you mindfully eat real food.
This year I've posted less often, but I have whipped up some recipes I'm proud of. My top ten this year is not a list of the most beautiful or fanciest recipes I've made. Instead, these are what I think are my most useful recipes to have. Each one has been made more than once in my kitchen, and maybe even once or twice in yours!
Thank you for reading, thank you for commenting, thank you for cooking, thank you for making this blogging hobby fun for me. I have very high expectations for 2012, I predict good things are going to happen!
Top Ten of Green and Lean 2011:
10. Creamed Leeks - As a base for fish or paired with pasta, creamed leeks are rich and sweet and so elegant.
9. Peanummus - A brilliant way to make hummus into a sweet dip for apples by adding peanut butter. I love this stuff and could eat it in a bowl with a spoon. Full of protein for a great energy-boosting snack.
8. Oven Dried Apple Chips - these are so simple, and still good for you. Who knew you could get your apple a day by eating these addictive chips?
7. Spicy Broiled Tofu - My newest favorite cooking discovery was this 6-minute broiled method for tofu. It's so quick and your tofu ends up nice and chewy. I made a Buffalo Tofu Sandwich with the method too.
6. Fish and Mashed Potato Croquettes - I make these All. The. Time. It's the perfect weeknight meal. Sometimes I don't have potatoes so I substitute bread crumbs. Sometimes I used canned fish. I always put it on a bed of sauteed peas and onions. Yum.
5. Roasted Onion Soup - A vegetarian version of the soup I always want to eat in restaurants. And all the work is done in the oven! I am seriously obsessed with roasting everything. This soup works with any vegetable but I like the cheesy crust on the onion soup!
4. Green and Lean Smoothie - At least once a week I make this. Sometimes for breakfast, sometimes for lunch, sometimes for a snack. It makes me feel comfortably full and it's basically a delicious milkshake that is super good for me!
3. Zucchini Chevre Tartine - This will be my favorite summer meal for the rest of my life. And it's so pretty - dark brown, bright green, and snowy white. It's light but substantial and very good with a glass of crisp white wine.
2. Roasted Mushrooms over Polenta - Delicious. I love this recipe for it's beauty, simplicity, and crazy good flavor. Winter comfort food that's healthy!
1. Bird Bars - Without a doubt, these are the biggest hit to come out of my kitchen in 2011. So many people have told me they've made and loved these bars! And no oven needed, so they take about 5 minutes to throw together. Nothing better!
Happy New Year!
ONE YEAR AGO: Top Ten of Green and Lean '10
TWO YEARS AGO: Top Ten of Green and Lean '09
Saturday, December 31, 2011
Thursday, December 29, 2011
Spinach Ricotta Gnudi
I love this week - the last one of the calendar year. During this week, I find myself reflecting on the year I just conquered and psyching myself up to kick the next one in the ass.

This week it's quieter at work, rush hour traffic is nonexistent, the stress of Christmas and family obligations is gone, and everyone is just looking forward to a good New Year's Eve party with a glass of bubbly. Everything has a lovely, lazy, lighthearted feeling to it.

It's a great week to cook and try new recipes. I've had this one on my to-do list for a very, very long time. I'm so glad I finally buckled down and tried it - it's one of those recipes that's brilliant in it's simplicity.

Gnudi (pronounced "nudie" and yes, it means nude in Italian) sound like gnocchi, look like white meatballs, and taste like airy fluffy pillows of melt-in-your mouth creamy cheese. The first thing I thought of after taking a bite was that it tasted like very high quality homemade cheese ravioli, except it was missing it's pasta pants (duh, it's nude!).

It's OK the pasta has been stripped away from gnudi because I've seen pasta get made on TV and it doesn't look easy or fun to roll that stuff out. Plus, I don't care much for pasta anyways - I'd rather eat just the filling! Also, I think this would be a great way for gluten-free folks to get their pasta fix if they substituted some other kind of flour in the gnudi mixture (that hasn't been tested, just a theory).

The main ingredient here is ricotta cheese. I've never been a big fan of the stuff. But I heard about a homemade version that was transcendent so I flirted with the idea of making my own. I still may someday, but since it was a weeknight, I stopped at Whole Foods and bought the hand-dipped fresh ricotta. I can't imagine mass-produced commercial ricotta in those dairy aisle tubs would taste as delicious as this did.

Because this was. SO. Delicious. I surprised myself at how much I loved this dish, and especially at how easy it was to make. What an elegant main dish to serve at an Italian-themed dinner party with some tuna and white bean bruschetta, a mixed green salad, healthy amounts of wine, and some dark chocolate for dessert. That's a party invite I imagine very few people could turn down. I might have to try it to see.

Spinach Ricotta Gnudi, adapted from Anne Burrell
Makes about 30 golf ball size gnudi
2 cups fresh ricotta, drained through a kitchen towel or cheesecloth for at least 1 hour
1 box frozen chopped spinach, thawed and squeezed dry and chopped fine
2 eggs
1 cup finely grated parmesan cheese
grated fresh nutmeg (maybe 1/8 tsp)
salt and pepper to taste
up to 1/2 cup flour, plus more for dusting
pasta sauce (I used some roasted tomato sauce, frozen since September - but click the original recipe link for another option, or use this easy one. I suppose you could use a jar of store bought sauce if you really must but all the sodium and preservatives will probably overpower the delicate flavor of the gnudi.)
Mix your ricotta, spinach, eggs, parmesan cheese, and nutmeg/salt/pepper together in a large bowl. Add flour, 1/4 cup at a time and mix until it's thick and scoopable (i.e. you should be able to put some in an ice cream scoop and hold it upside down and it wouldn't fall out). But the mix should still be fairly goopy - that's what will make the finished gnudi so light and fluffy.
Sprinkle a thick layer of flour on a large rimmed baking sheet. Using an ice cream scoop or large spoon, drop mounds of ricotta dough onto flour - about the size of a golf ball. Shake pan so dough balls roll around in flour and become completely covered. You will probably end up covered in flour.
Heat a large pot of water to boiling and salt it generously. Drop gnudi gently into boiling water and boil for 6 minutes. Remove gnudi with slotted spoon and serve atop heated pasta sauce garnished with more grated parmesan cheese.
ONE YEAR AGO: Spicy Beans and Tomatoes on Polenta
TWO YEARS AGO: Homemade Barbecue Sauce

This week it's quieter at work, rush hour traffic is nonexistent, the stress of Christmas and family obligations is gone, and everyone is just looking forward to a good New Year's Eve party with a glass of bubbly. Everything has a lovely, lazy, lighthearted feeling to it.

It's a great week to cook and try new recipes. I've had this one on my to-do list for a very, very long time. I'm so glad I finally buckled down and tried it - it's one of those recipes that's brilliant in it's simplicity.

Gnudi (pronounced "nudie" and yes, it means nude in Italian) sound like gnocchi, look like white meatballs, and taste like airy fluffy pillows of melt-in-your mouth creamy cheese. The first thing I thought of after taking a bite was that it tasted like very high quality homemade cheese ravioli, except it was missing it's pasta pants (duh, it's nude!).

It's OK the pasta has been stripped away from gnudi because I've seen pasta get made on TV and it doesn't look easy or fun to roll that stuff out. Plus, I don't care much for pasta anyways - I'd rather eat just the filling! Also, I think this would be a great way for gluten-free folks to get their pasta fix if they substituted some other kind of flour in the gnudi mixture (that hasn't been tested, just a theory).

The main ingredient here is ricotta cheese. I've never been a big fan of the stuff. But I heard about a homemade version that was transcendent so I flirted with the idea of making my own. I still may someday, but since it was a weeknight, I stopped at Whole Foods and bought the hand-dipped fresh ricotta. I can't imagine mass-produced commercial ricotta in those dairy aisle tubs would taste as delicious as this did.

Because this was. SO. Delicious. I surprised myself at how much I loved this dish, and especially at how easy it was to make. What an elegant main dish to serve at an Italian-themed dinner party with some tuna and white bean bruschetta, a mixed green salad, healthy amounts of wine, and some dark chocolate for dessert. That's a party invite I imagine very few people could turn down. I might have to try it to see.

Spinach Ricotta Gnudi, adapted from Anne Burrell
Makes about 30 golf ball size gnudi
2 cups fresh ricotta, drained through a kitchen towel or cheesecloth for at least 1 hour
1 box frozen chopped spinach, thawed and squeezed dry and chopped fine
2 eggs
1 cup finely grated parmesan cheese
grated fresh nutmeg (maybe 1/8 tsp)
salt and pepper to taste
up to 1/2 cup flour, plus more for dusting
pasta sauce (I used some roasted tomato sauce, frozen since September - but click the original recipe link for another option, or use this easy one. I suppose you could use a jar of store bought sauce if you really must but all the sodium and preservatives will probably overpower the delicate flavor of the gnudi.)
Mix your ricotta, spinach, eggs, parmesan cheese, and nutmeg/salt/pepper together in a large bowl. Add flour, 1/4 cup at a time and mix until it's thick and scoopable (i.e. you should be able to put some in an ice cream scoop and hold it upside down and it wouldn't fall out). But the mix should still be fairly goopy - that's what will make the finished gnudi so light and fluffy.
Sprinkle a thick layer of flour on a large rimmed baking sheet. Using an ice cream scoop or large spoon, drop mounds of ricotta dough onto flour - about the size of a golf ball. Shake pan so dough balls roll around in flour and become completely covered. You will probably end up covered in flour.
Heat a large pot of water to boiling and salt it generously. Drop gnudi gently into boiling water and boil for 6 minutes. Remove gnudi with slotted spoon and serve atop heated pasta sauce garnished with more grated parmesan cheese.
TWO YEARS AGO: Homemade Barbecue Sauce
Tuesday, December 27, 2011
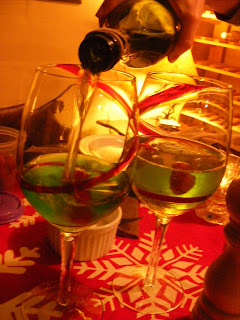
Homemade Kahlua
'Tis the season to be jolly and for making spirits bright! I promise it will be easy to be jolly after enjoying these homemade spirits. Um, in moderation. Because I can also promise the opposite of jolly if you overdo it.
My mom and I have been making this homemade Kahlua for years and she can't remember where the recipe came from so I can't even credit a source. But it's cheap, easy, and so much more delicious than store bought Kahlua. It's worth the effort if you like a sweet coffee liqueur like Kahlua, or if you are looking for a perfect homemade Christmas gift for the Dude.

You could use vodka in the recipe, but we make ours an especially high-octane version by adding a bottle of Everclear. It's illegal to sell Everclear in Minnesota (because it's 95% alcohol, compared to most rum/vodkas which are about 60%). My mom lives near North Dakota so she can get the good stuff and smuggle it across the border for our clandestine moonshine operation.

To make this tasty treat, all you do is boil some ground coffee with water down to a nice thick coffee syrup, boil some sugar water, add vanilla and Everclear, and presto: black gold.

This liqueur can be enjoyed on the rocks or in any of the sweet dessert cocktails listed below. I'm on quite the White Russian kick lately, hence the Dude reference above.
Homemade Kahlua
Makes approx 5 bottles - I like to use colorful decorative bottles when giving this as a gift - hit the jackpot at a Pier 1 clearance shelf a few years ago and got several for only a couple bucks each. However, wine bottles or mason jars work just as well, as do old real Kahlua bottles, including one shaped like a Buddha that I brought back from my first trip to Mexico in 1998 at age 19 for 133 pesos.
1 pound coarse ground coffee (I use French Roast)
8 cups sugar
16 cups water, divided
1/4 cup (2 oz) pure vanilla
1 liter Everclear or vodka
In one big pot, bring coffee and 6 cups water to a boil. In another big pot, bring sugar and 10 cups water to a boil. Cover and simmer both pots separately for 45 minutes, then cool both completely.
Strain coffee through cheesecloth or a kitchen towel to get the coffee liquid (should have about 1 1/4 cups), discard/compost the used grounds.
Mix together sugar water, coffee syrup, vanilla, and Everclear in a big pot or bowl. Use a funnel and pour into bottles. Will keep forever, stored at room temperature.

Kahlua Cocktail Recipes
Note: Most Kahula drinks also typically call for vodka as another ingredient. This is most certainly not needed if you made your Kahlua with Everclear.
White Russian
2 oz homemade Kahlua
splash of cream or half and half
Mix together and serve over ice.
Colorado Bulldog
2 oz homemade Kahlua
6 oz regular or diet cola
splash of cream or half and half
Pour Kahlua over ice. Fill glass nearly to top with cola and add a splash of cream. Stir and serve. Optional to garnish with hazelnuts.
Mudslide
2 oz homemade Kahlua
2 scoops vanilla ice cream
Blend together and serve in a small glass with a drizzle of chocolate syrup. Optional to garnish with nuts.
ONE YEAR AGO: Mixed Vegetable Hash
TWO YEARS AGO: White Beans, Kale, and Tomatoes
Wednesday, December 14, 2011
Spanakopita Triangles
God, I love entertaining! My second holiday party of the season had a Greek theme. I like giving parties a theme to help me narrow down what to serve. I think successful cocktail party nibbles have the right mix of hot and cold foods, something cheesy, something proteiny, and lots of veggies. And, don't forget the booze!


For my Greek holiday cocktail party, I served a layered dip with hummus, artichokes, cucumber, red pepper, kalamata olives, and feta cheese with toasted pita triangles for dipping. I thought of this as the Greek version of a taco dip, and taco dip is a guaranteed crowd pleaser. This was, too!

I also made a tzatziki dip. If that's Greek to you (ha ha, pun intended, I kill me!), tzatziki is a Greek yogurt and cucumber dip flavored with lemon, garlic, and dill. For extra visual excitement, try serving your vegetable dip in a hollowed out head of cabbage. It's so beautiful!

As a sidenote, leftover red cabbage is an absolutely awesome side dish if you cut it into wedges, douse it with oil, salt, and pepper and roast in a hot oven until the edges are charred. Then squeeze some lemon juice and grate fresh parmesan on top before gobbling it up.
My favorite appetizer at this party was the Spanakopita Triangles. This is basically just spinach and feta cheese wrapped in butter-drenched phyllo dough.

If you've never used phyllo dough, let me be straight with you and admit it's not fun. I'd be lying if I said there weren't some profanities flying 'round my kitchen while figuring out this stuff. However, once I figured it out (secret trick: follow instructions to make sure phyllo is thawed as directed, then keep it covered with a damp towel), it was a cinch.


The best part about these triangles is that you can prepare them in advance, then freeze. All I had to do before my guests arrived was preheat the oven. They turned out beautifully golden brown, flaky, buttery, lemony, cheesy, salty, and GREEN (in my world that means they're good for you!).


Spanakopita Triangles, adapted from Fine Cooking
Makes about 15 triangles
1 package frozen phyllo (or filo) sheets, thawed according to package instructions
1 box frozen chopped spinach, thawed and squeezed dry
1/2 cup crumbled feta cheese
1/4 cup sun dried tomatoes, oil drained and chopped
1/4 cup kalamata olives, chopped
2 eggs
2 cloves garlic, minces or grated on microplane
juice and zest from 1/2 lemon
pinch of salt, and few grinds black pepper
about 1 stick melted butter - you may need more
In a large bowl, mix together all your ingredients, except the phyllo and melted butter.
Open the phyllo package and keep sheets covered with a damp towel. Peel off a sheet of phyllo and lay on a clean dry surface. Brush liberally with melted butter and top with another sheet of phyllo. Brush again with melted butter. If phyllo rips, just put another sheet or piece on top of the ripped part - you're going to be wrapping this up so chances are it won't matter.
Cut the sheet of phyllo down the center the long way, so you end up with two long strips. Place a heaping tablespoon of spinach filling in the bottom right corner of each strip. Fold it up like a flag in triangles.
Place on a parchment or tinfoil-lined baking sheet and cover with another damp towel. Continue until you've used up all your filling. Freeze sheet pan for an hour or two, then transfer triangles to longer-term freezer storage (ziploc bags or tupperware).
When ready to serve, brush tops of triangles with melted butter and bake at 375 degrees until golden brown and hot (took me about 12 minutes from frozen, 8 minutes from fresh).
ONE YEAR AGO: Sweet Onion and Mushroom Galette
TWO YEARS AGO: Creamed Mushroom Artichoke Pasta
Wednesday, December 7, 2011
Mint Chocolate Truffle Tart
If you insist on serving something light and vegetabley at your holiday dinner parties, then I think it's kind of mandatory to reward your guests with something decadent and rich for dessert.
I knew I wanted to serve a minty dessert, since mint to me means holiday. Why this is, I've no idea...maybe because candy canes are sort of minty? Whatever. I wanted a punch-you-in-the-face mint flavor, WITHOUT using any mint extract because I think most extracts taste artificial and chemical-laden.

I diligently did my google research, searching mint tart recipes and stumbled upon this one. You know, taking recipes off a blog is a risky venture (yeah I mean mine, too!). You never know if you can trust the recipe-writer, or if your tastes match theirs. What a lovely surprise to find this tart was absolutely delicious, with a melt-in-your-mouth texture and outstanding chocolate-mint flavor. The texture of the filling is exactly that of a truffle. The crust is the perfect combination of chocolately sweetness with a nice mellow saltiness and rich butteriness.
Best of all, this tart is so darn easy to make and you can make it in advance of your party. I just recommend taking it out of the fridge to come to room temperature before serving - that really makes the flavors pop.

Mint Chocolate Truffle Tart, adapted from Not So Humble Pie
Makes 16 small slices
1/2 cup powdered sugar
1 cup flour
1/4 cup cocoa powder
1/4 tsp salt
1 stick cold butter, cut into little pieces
1 1/4 cup heavy cream
40 fresh mint leaves
1 1/2 bags semi-sweet chocolate chips
2 Tbsp butter
Preheat your oven to 350 degrees.
In a food processor, pulse together the powdered sugar, flour, cocoa powder, and salt. Add butter and pulse some more until it makes a small pebbles texture (I over processed and it ended up like fine sand - that's OK, it still works). If you don't have a food processor, use forks or knives to cut the butter into the dry ingredients. Press the mixture into an 11 inch tart pan, or large pie pan. Bake for 15 minutes.
Heat your cream until it's simmering. Tear up your mint leaves, or crush them to release the flavor and add to the hot cream. Remove cream from heat and let the mint leaves steep in the cream for 20-30 minutes. Strain out the mint leaves.
In a double boiler (heat-safe bowl resting over a pot of simmering water), slowly stir together your mint-flavored cream, chocolate chips, and butter. Once it's all melted together, it will be a thick, glossy, dark chocolate mixture. Pour over your cooled crust, and refrigerate to set.
Let come to room temperature before serving. I had some leftover cream in the pint I bought for this recipe so I whipped it up and added it for garnish.
ONE YEAR AGO: Banana, Chocolate, and Pumpkin Waffles
TWO YEARS AGO: Green and Lean Loaf
Sunday, December 4, 2011
Roasted Vegetable Crepe Cake
This is the year!


The year for what, you ask?

Well, I've decided this is the year I'm no longer the Christmas grinch. I have always liked Christmas in general but the stress of buying gifts the past few years has turned me into a mega-grinch about the whole holiday. I hate shopping, avoid malls, despise crowds of slow moving dolts, and put way too much pressure on myself to find the perfect gifts for the people I love. It has resulted in some cranky Decembers.


This year, I was proactive and had my (mostly online) shopping done before Thanksgiving. What a gigantic weight off my shoulders! It frees up all kinds of time to host holiday dinner parties! Now THAT'S the kind of thing to get a girl like me in the Christmas spirit!
I had five fabulous women in my house last night for the best kickoff to the holiday season I could ever hope to have. By the way, the secret to perfect parties is always in the guest list. Have good people there, and it doesn't matter what you serve or do, it will be a success! Uh, but booze helps a lot, too.


As soon as I saw the photo of this Roasted Vegetable Crepe Cake linked on The Kitchn, I knew I'd make it someday for a party. Because it's so fussy, it's not the kind of thing you'd ever make just for a regular meal. It had to be for some kind of special occasion like a Saturday night in December.
You start by making a double batch of crepes. I used Alton Brown's recipe (he's never steered me wrong, and his streak continues). Crepes are simple, but take lots of time to cook one at a time. Then you layer the crepes with some roasted vegetables and cheese. I used bell peppers, onion, zucchini, mushrooms, tomatoes, spinach, and even attempted some eggplant (I'm trying to like it but I just don't so I ended up not using it).
I'll let the photos tell the story of building this cake from the ground up.
Zucchini

Gouda

Mushrooms

Goat Cheese

Tomatoes

Parmesan

Spinach

Bell Peppers

Goat Cheese

Mushrooms

Final Crepe
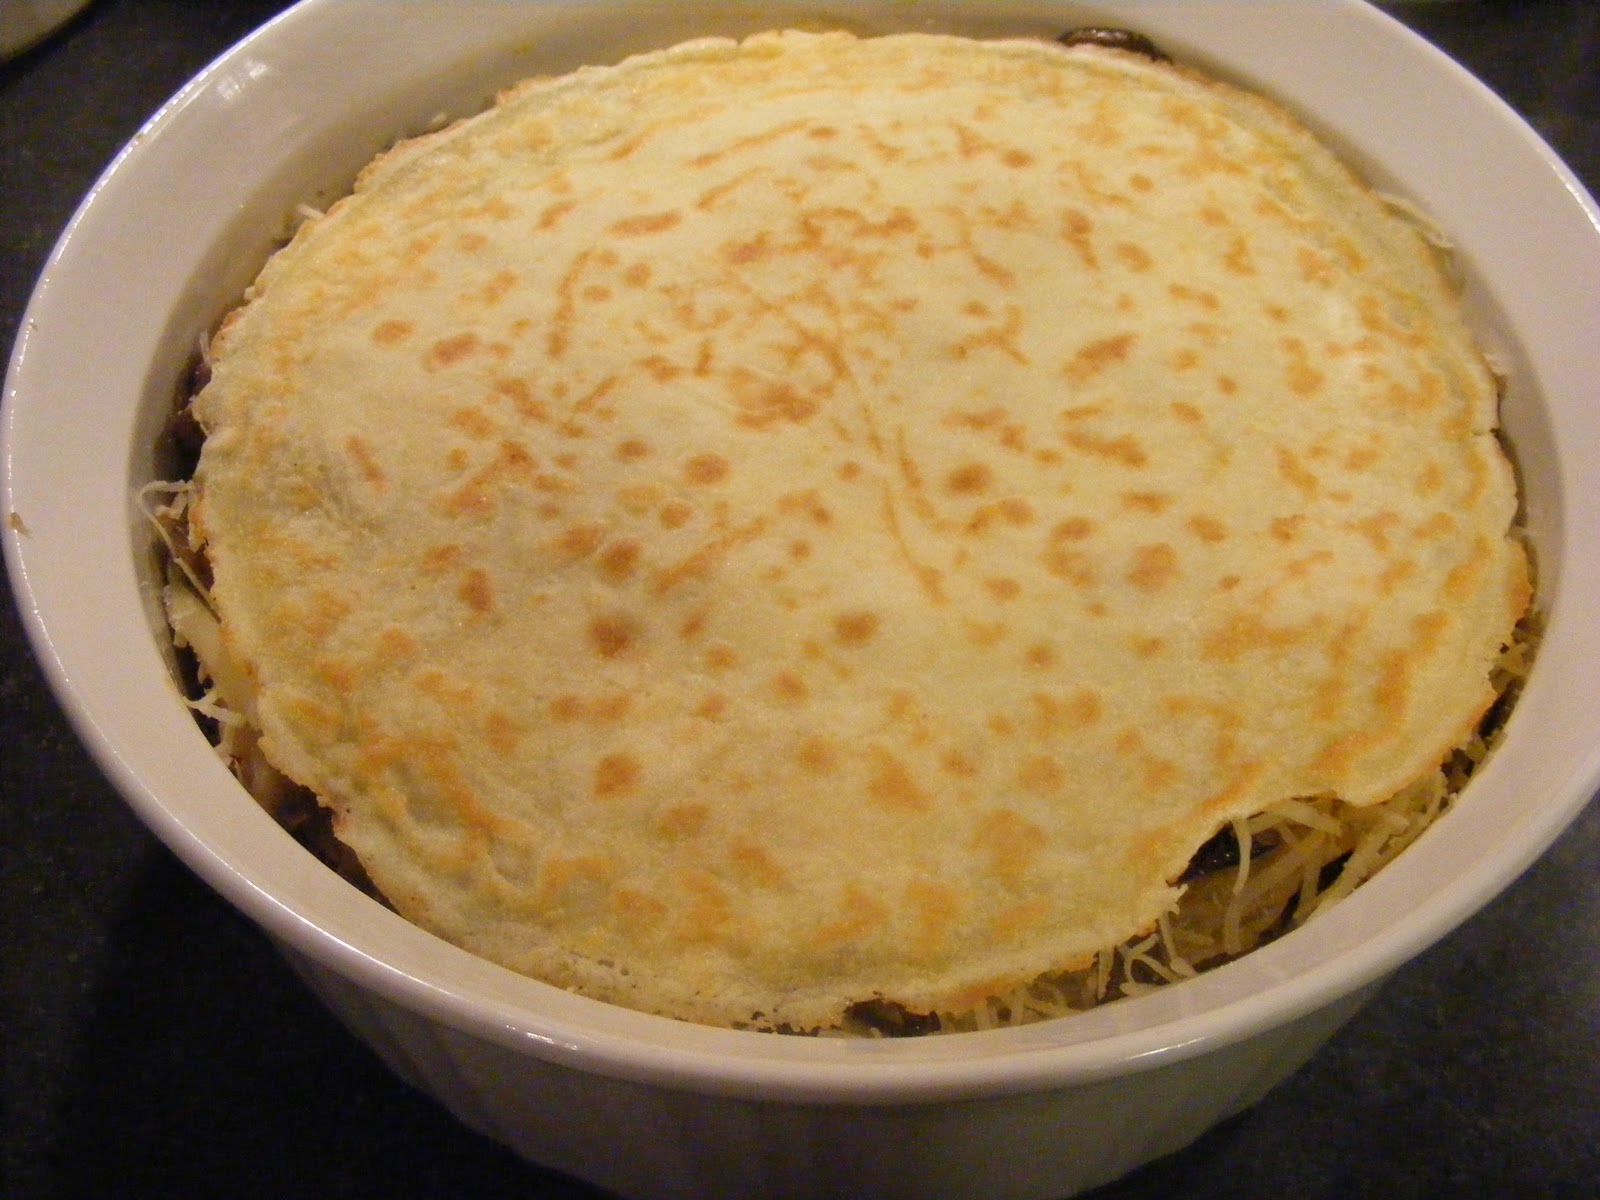
Once it's all assembled in your pan, bake until hot all the way through and the cheese is melty. Next time I make this, I will use more vegetables. I like crepes but this was very crepey. I wanted thin layers but they were a tad too thin. That was a very minor complaint. Overall, I really liked this cake!

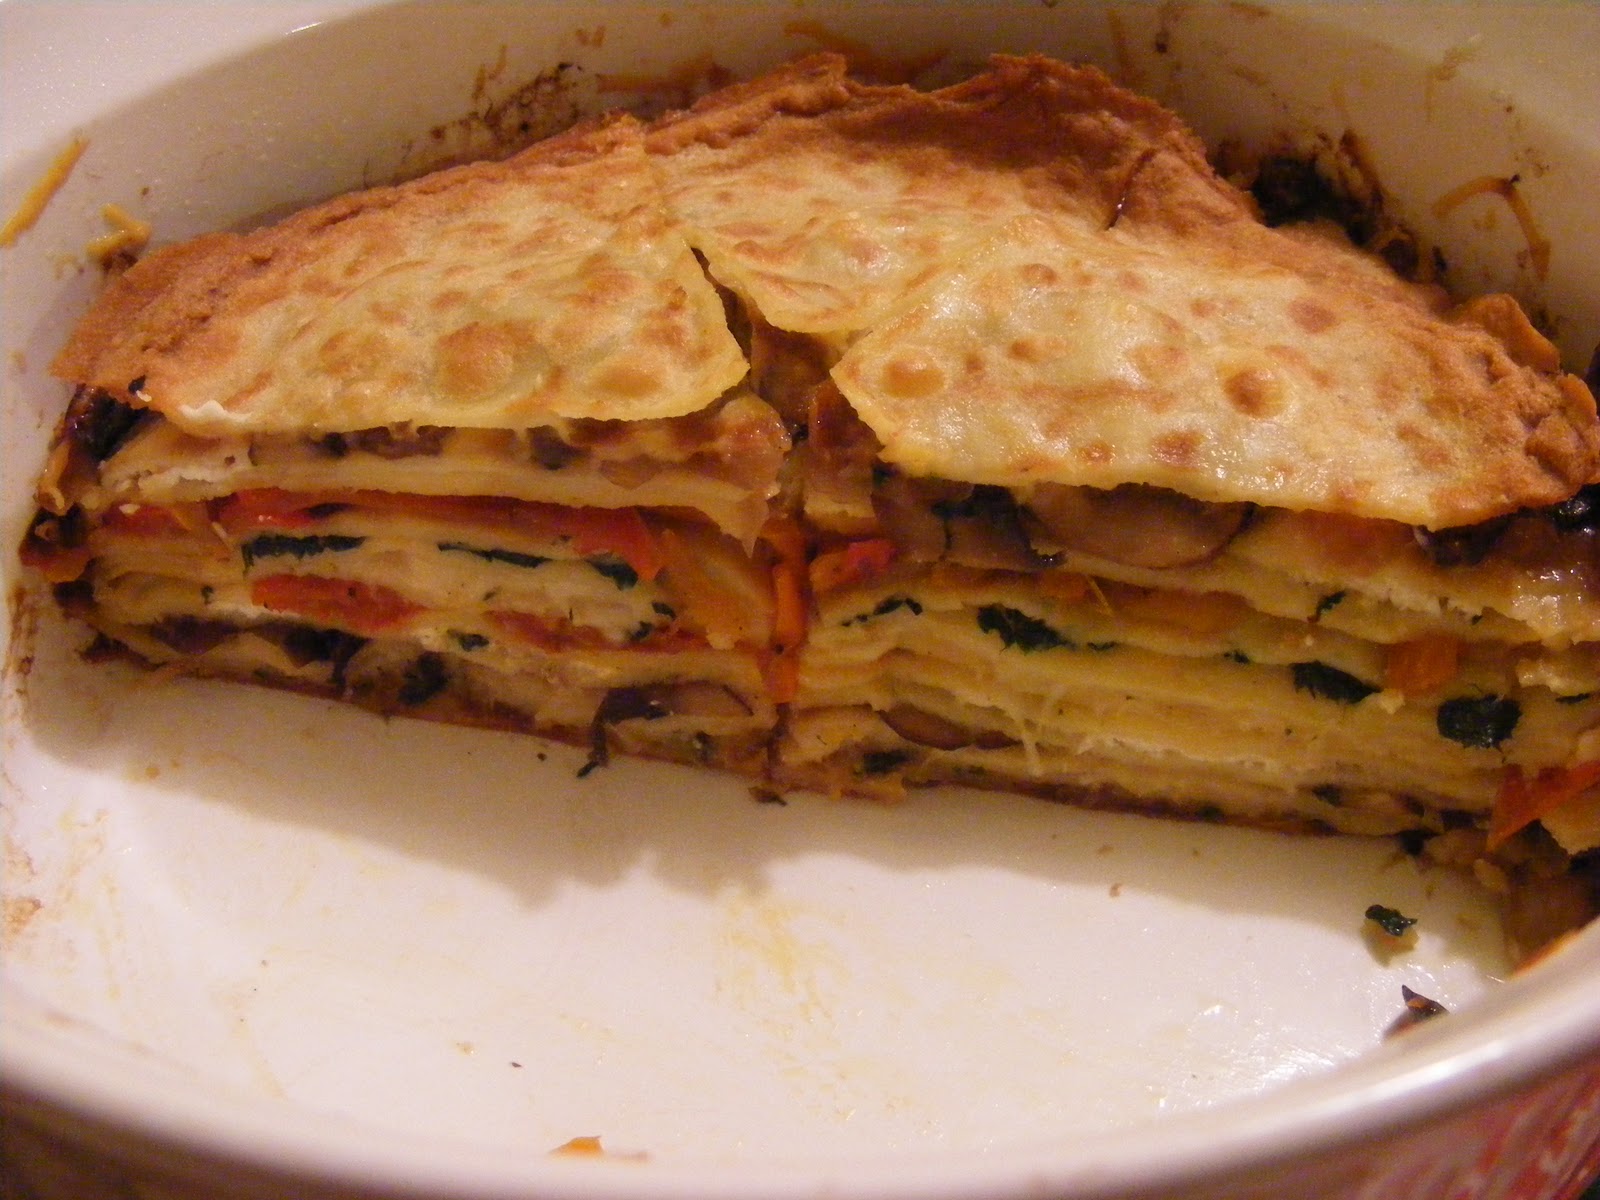
I was very pleased with this crepe cake. The flavor of the roasted vegetables was outstanding, and the finished cake was gorgeous. So all you Whos down in Whoville, make this instead of Roast Beast and you'll realize maybe Christmas doesn't come from the store....maybe Christmas means a little bit more!

Roasted Vegetable Crepe Cake, from The Three Cheeses
Serves 4
2 batches crepes (I made them and stacked them between wax paper until I was ready to assemble my cake. You won't need them all, but I needed more than 1 batch. Leftovers are OK!)
3 bell peppers of assorted colors, sliced thin
2 zucchinis, sliced thin
1 package crimini mushrooms, sliced thin
1 pint cherry or grape tomatoes, sliced in half
1 medium onion, diced fine
1 bag fresh spinach, wilted (or frozen spinach thawed and water squeezed out)
1 log goat cheese
1/2 cup shredded gouda (or mozzarella, fontina, or other cheese)
1/2 cup shredded parmesan
Roast all your vegetables with olive oil, salt, and pepper on baking sheets for 30 minutes at 425 degrees, or until soft and beginning to char slightly on the edges. I made sure to roast some onions with each vegetable so the onion flavor would permeate the entire cake in all layers.
Begin layering your crepes in a baking dish or round cake pan, putting vegetables or cheese in each layer. Cover and bake at 350 degrees for 45-55 minutes or until hot all the way through.
ONE YEAR AGO: Roasted Vegetable Mac-n-Cheese
TWO YEARS AGO: More Vegetable than Egg Frittata
Subscribe to:
Posts (Atom)